2009/12/25

Linux & NTFS

http://wiki.centos.org/zh-tw/TipsAndTricks/NTFS

1. Install
yum --enablerepo=rpmforge install fuse fuse-ntfs-3g

2. Mount it
mount /dev/The_NTFS_PARTION /the_mount_point

That's it.

2009/11/12

ssh via apache deamon user

Scenario: You have a web script (php, ruby, python, or so) that need to ssh over a remote machine to do stuff. How you do set up ssh key for the apache deamon user?

After some dig out, here's the steps, mostly taken from (Boredworkers.com):

Make key for apache daemon
1. log in to source server as root
2. create .ssh directory for apache user. Make sure you have the ownership right:

$ mkdir /var/www/.ssh
$ chown -R apache:nobody /var/www/.ssh


3. Generate the ssh-key authentication key as user apache using sudo. Use the default file location and leave empty when prompted for passphrase.

$ sudo -u apache ssh-keygen -t rsa


4. Append apache's public key to destination server

$ sudo -u apache cat .ssh/id_rsa.pub | ssh dest_user@dest_server 'cat >> ~/.ssh/authorized_keys'


5. Test the set up. You’ll see that you can now run ssh commands without being prompted for the user password:

$ sudo -u apache ssh dest_user@dest_server


refernce: http://www.boredworkers.com/2009/08/24/script-tips-ssh-key-for-apache/

2009/10/23

REHL: mount iso images

Below is the way to mount iso image file in REHL system:

Before you start to mount your iso image, you need to ensure the folder /mnt/isoimage is available, if /mnt/isoimage is not available just create one using command below:-

#mkdir /mnt/isoimage

* Once isoimage directory is available, you can use the command below to mount your iso image

# mount -o loop -t iso9660 myisoimage.iso /mnt/isoimage/

* You just mount your iso image file to /mnt/isoimage successfully. To access your iso image files, go to /mnt/isoimage

Once you finish using your files, below is the way to unmount your iso image:-

# umount /mnt/isoimage

2009/09/26

REHL: rsync setup & ssh keys

Have you ever wanted to know how to easily synchronize the data between multiple servers automatically?

rsync is the anwser. And here's some note. We will use rsync, ssh key authentication, and a cron job.

Let’s call the 2 servers "SOURCESERVER" and "DESTSERVER" for:
SOURCESERVER = Source server (the server we’re connecting from to upload the data)
DESTSERVER = Destination server (the server we’re connecting to receive the data)

Part 1 - Setting up SSH key authentication
First, we need to make sure the DESTSERVER has the ability to use key authentication enabled. Find your sshd configuration file (usually /etc/ssh/sshd_config) and enable the following options if they are not already set.

RSAAuthentication yes
PubkeyAuthentication yes
AuthorizedKeysFile .ssh/authorized_keys


If you edit the file be sure to restart sshd afterwards.

#service sshd restart


Next, on the SOURCESERVER we will create the public & private key pair to be used for authentication with the following command:

ssh-keygen -t dsa

*Note 1: Do not enter a passphrase for this, just hit enter when prompted.
*Note 2: if SOURCESERVER doesn't have key yet, do the keygen as well.

This should create 2 files in ~/.ssh folder, a public key file (id_dsa) and a private key file (id_dsa.pub).

The private key file (~/.ssh/id_dsa) we will keep on the SOURCESERVER.

*Be sure to keep this private key safe. With it anyone will be able to connect to the DESTSERVER that contains the public key.

chmod 700 ~/.ssh
chmod -R 600 ~/.ssh/*


Now we will add the public key we created on to the DESTSERVER.
Choose the user account which you will use to connect to on DESTSERVER, we'll call this user ‘destuser’ for now.

The public key file (~/.ssh/id_dsa.pub) we will upload to the DESTSERVER, and call it SOURCESERVER.pub.

scp ~/.ssh/id_dsa.pub DESTUSER@DESTSERVER:~/.ssh/SOURCESERVER.pub


On the DESTSERVER, in the DESTUSER's home directory, in the .ssh folder, create a new text file called "authorized_keys".
touch ~/.ssh/authorized_keys

If it already exists, great, we will use the existing authorized_keys file to add the SOURCESERVER's public key.

cat ~/.ssh/SOURCESERVER.pub >> ~/.ssh/authorized_keys


Be sure the permissions for key files are 600 and 700 for the ‘.ssh’ folder.

Now to test that the keys are working. From the SOURCESERVER try logging in as normal using ssh to the DESTSERVER.

# ssh destuser@DESTSERVER


If all is working you should not be prompted for a password and able to connected directly to a shell on the DESTSERVER.

Part 2 - Creating the rsync script
Now for the rsync script. I use a simple script such as the following

#!/bin/bash

SOURCEPATH=’/source/directory’
DESTPATH=’/destination’
DESTHOST=’123.123.123.123′
DESTUSER=’destuser’
LOGFILE=’rsync.log’

echo $’\n\n’ >> $LOGFILE
rsync -av –rsh=ssh $SOURCEPATH $DESTUSER@$DESTHOST:$DESTPATH 2>&1 >> $LOGFILE
echo “Completed at: `/bin/date`” >> $LOGFILE

Copy this file into the home directory of the sourceuser on the SOURCESERVER and modify the first 4 variables in the file.

SOURCEPATH (Source path to be synced)
DESTPATH (Destination path to be synced)
DESTHOST (Destination IP address or host name)
DESTUSER (User on the destination server)

Save it as something like ‘rsync.sh’

Set the permissions on the file to 700.
# chmod 700 rsync.sh

Now you should be able to run the script, have it connect to the DESTSERVER, and transfer the files all without your interaction.

The script will send all output to the ‘rsync.log’ file specified in the script.

Part 3 - Setting up the cron job

Assuming everything has worked so far all that’s left is to setup a cron job to run the script automatically at a predefined interval.

As the same sourceuser use the ‘crontab’ command to create a new cron job.

# crontab -e

This will open an editor where you can schedule the job. Enter the following to have the script run once every hour:

# Run my rsync script once every hour
0 * * * * /path/to/rsync.sh

Your 2 servers should now be syncing the chosen directory once every hour.

2009/09/20

Prevent .DS_Store file creation over network connections

1. Open the Terminal application from the Utilities folder which is nested in the Applications folder

2. In the newly opened terminal type:

defaults write com.apple.desktopservices DSDontWriteNetworkStores true

3. Restart the computer for the change to take effect

Reference: http://support.apple.com/kb/HT1629

2009/09/19

VMware Fusion - remove "Bootcamp partition" from Virtual Machine Library List

The boot camp VM is broken because missing files. How do you redo it all?

It's extremely annoying that one cannot remove the Boot Camp partition entry on the Virtual Machine Library without going through some hoops and jumps...

If you do the following this will stop the Boot Camp partition entry from showing on the Virtual Machine Library...

1. Close Fusion

2. In a Terminal (/Applications/Utilities/Terminal) copy and paste the following command, as is, and then press Enter and type in your password then press Enter.

sudo mv "/Library/Application Support/VMware Fusion/vmware-rawdiskCreator" "/Library/Application Support/VMware Fusion/vmware-rawdiskCreator.bak"


3. Open Fusion and then ctrl-click the Boot Camp partition entry on the Virtual Machine Library and select Delete.

Note: If you have Imported the Boot Camp partition as a normal file based Virtual Machine you could have a Boot Camp partition entry on the Virtual Machine Library that you do not want to delete so before deleting the Boot Camp partition entry on the Virtual Machine Library you can ctrl-click the Boot Camp partition entry on the Virtual Machine Library and select Show in Finder and then make sure this is the one in your "/Users/${USER}/Library/Application Support/VMware Fusion/Virtual Machines/Boot Camp" folder before removing it from the Virtual Machine Library.

To restore the Boot Camp partition entry on the Virtual Machine Library...


1. Close Fusion

2. In a Terminal (/Applications/Utilities/Terminal) copy and paste the following command, as is, and then press Enter and type in your password then press Enter.

sudo mv "/Library/Application Support/VMware Fusion/vmware-rawdiskCreator.bak" "/Library/Application Support/VMware Fusion/vmware-rawdiskCreator"

Reference: http://communities.vmware.com/thread/200649

2009/09/06

How to reset su password in snow leopard

In 10.5.x or earlier version of OSX, you use Directory Utility to enable root user and reset its password. In Snow Leopard, the utility is removed under the Application/Utility folder. So what do you do?

sudo passwd

Alternately, you can navigate to /System/Library/CoreServices/Directory Utility.app to do it in the old way.

How-To: Recursively remove .svn folders

Moved from windows to mac, the old "D drive" staff need a bit of re-org. One big trouble I found is that OSX doesn't deal with file start with "dot" well. For example, the ".svn" folders.

So how to get rid of these? On any *nix machine (Mac included) you can run the following command:

rm -rf 'find . -type d -name .svn'

Drupal install on CentOS5

PHP 5.3 is not supported on current Drupal (6.14), and CentOS's PHP version is still on 5.1.9. So the drupal installation needs a little bit of work.

1. Install MySQL 5.1
cd /etc/yum.repos.d
wget wget http://rpms.famillecollet.com/enterprise/remi-release-5.rpm
yum --enablerepo=remi install mysql mysql-server mysql-devel mysql-libs


2. Install PHP 5.2.9 from CentOS testing repository:
cd /etc/yum.repos.d
wget http://dev.centos.org/centos/5/CentOS-Testing.repo
yum --enablerepo=c5-testing install php php-devel php-pear php-pecl php-mcrypt php-xml php-xml php-imap php-soap php-mbstring php-mysql php-cli php-mysql


3. drupal clean URL config (sample)
there are many ways to turn on clean URL. Here's how I do it:
AllowOverride All
Options Indexes FollowSymLinks MultiViews
Order allow,deny
Allow from all

RewriteEngine on
RewriteBase /
RewriteCond %{REQUEST_FILENAME} !-f
RewriteCond %{REQUEST_FILENAME} !-d
RewriteRule ^(.*)$ index.php?q=$1 [L,QSA]

Alias /drupal /var/www/drupal


4. PHP.ini
modify the following keys, this is my settings:

max_input_time = 100 ; Maximum amount of time each script may spend parsing request data
memory_limit = 100M ; Maximum amount of memory a script may consume (16MB)
error_reporting = E_ALL
memory_limit = 100M ; Maximum amount of memory a script may consume (16MB)
upload_max_filesize = 100M


5. upload progress

add the extension to php.ini:
if you don't have gcc installed:
yum -y groupinstall "Development Tools"

install pecl related if you don't have them yet:

yum -y install php-devel php-pecl php-pear


install the upload progress:

pecl install uploadprogress


edit your /etc/php.ini and add this line under extension section:

extension=uploadprogress.so


6. GD library

yum --enablerepo=c5-testing install gd gd-devel php-gd


6. Install drupal

2009/08/31

MacBook Pro - share internet connection with Windows PDA via Bluetooth

To share 3G connection from PDA to MacBook, here's the steps:

1. Turn on Bluetooth on both devices (MBP and PDA)
2. Pair up (if you're not yet done it)
3. Start the internet sharing program on PDA
4. On MBP, click on the bluetooth icon on the menu bar (assuming you have it on the menu bar), under your PDA device, select "Connect".
5. Happy browsing.

My working device is: MBP 990 (OSX 10.5.8), HTC Curise (WM 6.1).

2009/08/30

Quickest way to reset mysql root password

If you forgot root password for MySQL, this is the quickest way to reset it. You need to have root access to the box.
service mysqld stop

wait until MySQL shuts down. Then run
mysqld_safe --skip-grant-tables &

**In Windows, cd to mysql path, e.g. C:\Program Files\MySQL\MySQL Server 5.1\bin, then
mysqld.exe -u root --skip-grant-tables


then you will be able to login as root with no password.
mysql -u root

In MySQL command line prompt issue the following command:
mysql> use mysql;
mysql> UPDATE user SET password=PASSWORD('the_new_password') WHERE user='root';
mysql> FLUSH PRIVILEGES;

At this time your root password is reset and MySQL will now know the privileges and you'll be able to login with your new password:
mysql -u root -p


Back to production mode
killall mysqld
service mysqld start

2009/07/22

Installing PECL uploadprogress Extension for Drupal (RHEL)

The PECL uploadprogress modules allows a user to see a upload progress bar.
This is a great UI that makes uploading in action and hence good user experience.

To intall uploadprogress module:

1. install php development, pecl, pear, and development tools if you not yet have them installed:

yum -y install php-devel php-pecl php-pear
yum -y groupinstall "Development Tools"

2. install the upload progress:

pecl install uploadprogress

This is what you should get:

[root@xxx]# pecl install uploadprogress
downloading uploadprogress-1.0.1.tgz ...
Starting to download uploadprogress-1.0.1.tgz (8,536 bytes)
.....done: 8,536 bytes
4 source files, building
running: phpize
Configuring for:
PHP Api Version: 20041225
Zend Module Api No: 20060613
Zend Extension Api No: 220060519
building in /var/tmp/pear-build-root/uploadprogress-1.0.1
running: /var/tmp/uploadprogress/configure
checking for egrep... grep -E
checking for a sed that does not truncate output... /bin/sed
checking for cc... cc
checking for C compiler default output file name... a.out
checking whether the C compiler works... yes
checking whether we are cross compiling... no
checking for suffix of executables...
checking for suffix of object files... o
checking whether we are using the GNU C compiler... yes
checking whether cc accepts -g... yes
checking for cc option to accept ANSI C... none needed
checking how to run the C preprocessor... cc -E
checking for icc... no
checking for suncc... no
checking whether cc understands -c and -o together... yes
checking for system library directory... lib
checking if compiler supports -R... no
checking if compiler supports -Wl,-rpath,... yes
checking build system type... i686-redhat-linux-gnu
checking host system type... i686-redhat-linux-gnu
checking target system type... i686-redhat-linux-gnu
checking for PHP prefix... /usr
checking for PHP includes... -I/usr/include/php -I/usr/include/php/main -I/usr/include/php/TSRM -I/usr/include/php/Zend -I/usr/include/php/ext -I/usr/include/php/ext/date/lib
checking for PHP extension directory... /usr/lib/php/modules
checking for PHP installed headers prefix... /usr/include/php
checking if debug is enabled... no
checking if zts is enabled... no
checking for re2c... no
configure: WARNING: You will need re2c 0.13.4 or later if you want to regenerate PHP parsers.
checking for gawk... gawk
checking whether to enable uploadprogress functions... yes, shared
checking for ld used by cc... /usr/bin/ld
checking if the linker (/usr/bin/ld) is GNU ld... yes
checking for /usr/bin/ld option to reload object files... -r
checking for BSD-compatible nm... /usr/bin/nm -B
checking whether ln -s works... yes
checking how to recognise dependent libraries... pass_all
checking for ANSI C header files... yes
checking for sys/types.h... yes
checking for sys/stat.h... yes
checking for stdlib.h... yes
checking for string.h... yes
checking for memory.h... yes
checking for strings.h... yes
checking for inttypes.h... yes
checking for stdint.h... yes
checking for unistd.h... yes
checking dlfcn.h usability... yes
checking dlfcn.h presence... yes
checking for dlfcn.h... yes
checking for g77... no
checking for f77... no
checking for xlf... no
checking for frt... no
checking for pgf77... no
checking for fort77... no
checking for fl32... no
checking for af77... no
checking for f90... no
checking for xlf90... no
checking for pgf90... no
checking for epcf90... no
checking for f95... f95
checking whether we are using the GNU Fortran 77 compiler... yes
checking whether f95 accepts -g... yes
checking the maximum length of command line arguments... 32768
checking command to parse /usr/bin/nm -B output from cc object... ok
checking for objdir... .libs
checking for ar... ar
checking for ranlib... ranlib
checking for strip... strip
checking if cc supports -fno-rtti -fno-exceptions... no
checking for cc option to produce PIC... -fPIC
checking if cc PIC flag -fPIC works... yes
checking if cc static flag -static works... yes
checking if cc supports -c -o file.o... yes
checking whether the cc linker (/usr/bin/ld) supports shared libraries... yes
checking whether -lc should be explicitly linked in... no
checking dynamic linker characteristics... GNU/Linux ld.so
checking how to hardcode library paths into programs... immediate
checking whether stripping libraries is possible... yes
checking if libtool supports shared libraries... yes
checking whether to build shared libraries... yes
checking whether to build static libraries... no
configure: creating libtool
appending configuration tag "CXX" to libtool
appending configuration tag "F77" to libtool
checking if libtool supports shared libraries... yes
checking whether to build shared libraries... yes
checking whether to build static libraries... no
checking for f95 option to produce PIC... -fPIC
checking if f95 PIC flag -fPIC works... yes
checking if f95 static flag -static works... yes
checking if f95 supports -c -o file.o... yes
checking whether the f95 linker (/usr/bin/ld) supports shared libraries... yes
checking dynamic linker characteristics... GNU/Linux ld.so
checking how to hardcode library paths into programs... immediate
configure: creating ./config.status
config.status: creating config.h
running: make
/bin/sh /var/tmp/pear-build-root/uploadprogress-1.0.1/libtool --mode=compile cc -I. -I/var/tmp/uploadprogress -DPHP_ATOM_INC -I/var/tmp/pear-build-root/uploadprogress-1.0.1/include -I/var/tmp/pear-build-root/uploadprogress-1.0.1/main -I/var/tmp/uploadprogress -I/usr/include/php -I/usr/include/php/main -I/usr/include/php/TSRM -I/usr/include/php/Zend -I/usr/include/php/ext -I/usr/include/php/ext/date/lib -DHAVE_CONFIG_H -g -O2 -c /var/tmp/uploadprogress/uploadprogress.c -o uploadprogress.lo
mkdir .libs
cc -I. -I/var/tmp/uploadprogress -DPHP_ATOM_INC -I/var/tmp/pear-build-root/uploadprogress-1.0.1/include -I/var/tmp/pear-build-root/uploadprogress-1.0.1/main -I/var/tmp/uploadprogress -I/usr/include/php -I/usr/include/php/main -I/usr/include/php/TSRM -I/usr/include/php/Zend -I/usr/include/php/ext -I/usr/include/php/ext/date/lib -DHAVE_CONFIG_H -g -O2 -c /var/tmp/uploadprogress/uploadprogress.c -fPIC -DPIC -o .libs/uploadprogress.o
/bin/sh /var/tmp/pear-build-root/uploadprogress-1.0.1/libtool --mode=link cc -DPHP_ATOM_INC -I/var/tmp/pear-build-root/uploadprogress-1.0.1/include -I/var/tmp/pear-build-root/uploadprogress-1.0.1/main -I/var/tmp/uploadprogress -I/usr/include/php -I/usr/include/php/main -I/usr/include/php/TSRM -I/usr/include/php/Zend -I/usr/include/php/ext -I/usr/include/php/ext/date/lib -DHAVE_CONFIG_H -g -O2 -o uploadprogress.la -export-dynamic -avoid-version -prefer-pic -module -rpath /var/tmp/pear-build-root/uploadprogress-1.0.1/modules uploadprogress.lo
cc -shared .libs/uploadprogress.o -Wl,-soname -Wl,uploadprogress.so -o .libs/uploadprogress.so
creating uploadprogress.la
(cd .libs && rm -f uploadprogress.la && ln -s ../uploadprogress.la uploadprogress.la)
/bin/sh /var/tmp/pear-build-root/uploadprogress-1.0.1/libtool --mode=install cp ./uploadprogress.la /var/tmp/pear-build-root/uploadprogress-1.0.1/modules
cp ./.libs/uploadprogress.so /var/tmp/pear-build-root/uploadprogress-1.0.1/modules/uploadprogress.so
cp ./.libs/uploadprogress.lai /var/tmp/pear-build-root/uploadprogress-1.0.1/modules/uploadprogress.la
PATH="$PATH:/sbin" ldconfig -n /var/tmp/pear-build-root/uploadprogress-1.0.1/modules
----------------------------------------------------------------------
Libraries have been installed in:
/var/tmp/pear-build-root/uploadprogress-1.0.1/modules

If you ever happen to want to link against installed libraries
in a given directory, LIBDIR, you must either use libtool, and
specify the full pathname of the library, or use the `-LLIBDIR'
flag during linking and do at least one of the following:
- add LIBDIR to the `LD_LIBRARY_PATH' environment variable
during execution
- add LIBDIR to the `LD_RUN_PATH' environment variable
during linking
- use the `-Wl,--rpath -Wl,LIBDIR' linker flag
- have your system administrator add LIBDIR to `/etc/ld.so.conf'

See any operating system documentation about shared libraries for
more information, such as the ld(1) and ld.so(8) manual pages.
----------------------------------------------------------------------

Build complete.
Don't forget to run 'make test'.

running: make INSTALL_ROOT="/var/tmp/pear-build-root/install-uploadprogress-1.0.1" install
Installing shared extensions: /var/tmp/pear-build-root/install-uploadprogress-1.0.1/usr/lib/php/modules/
running: find "/var/tmp/pear-build-root/install-uploadprogress-1.0.1" | xargs ls -dils
27529277 4 drwxr-xr-x 3 root root 4096 Jul 22 00:48 /var/tmp/pear-build-root/install-uploadprogress-1.0.1
27529298 4 drwxr-xr-x 3 root root 4096 Jul 22 00:48 /var/tmp/pear-build-root/install-uploadprogress-1.0.1/usr
27529299 4 drwxr-xr-x 3 root root 4096 Jul 22 00:48 /var/tmp/pear-build-root/install-uploadprogress-1.0.1/usr/lib
27529300 4 drwxr-xr-x 3 root root 4096 Jul 22 00:48 /var/tmp/pear-build-root/install-uploadprogress-1.0.1/usr/lib/php
27529301 4 drwxr-xr-x 2 root root 4096 Jul 22 00:48 /var/tmp/pear-build-root/install-uploadprogress-1.0.1/usr/lib/php/modules
27529297 44 -rwxr-xr-x 1 root root 43639 Jul 22 00:48 /var/tmp/pear-build-root/install-uploadprogress-1.0.1/usr/lib/php/modules/uploadprogress.so

Build process completed successfully
Installing '/usr/lib/php/modules/uploadprogress.so'
install ok: channel://pecl.php.net/uploadprogress-1.0.1
configuration option "php_ini" is not set to php.ini location
You should add "extension=uploadprogress.so" to php.ini

3. add the extension to php.ini:

extension=uploadprogress.so

4. restart apache for the changes to take effect.

service httpd restart

2009/07/15

REHL: Install latest PHP (5.2.x) from Remi repository

A few app requires PHP 5.2.x but major repositories is yet support anything higher than 5.1.6 at this time. Recompile PHP is a pain also.

Remi maintains a repository that can save your 1 day or 2 if you have such need.

cd /etc/yum.repos.d/
wget http://download.fedora.redhat.com/pub/epel/5/i386/epel-release-5-3.noarch.rpm
wget http://rpms.famillecollet.com/enterprise/remi-release-5.rpm
rpm -Uvh remi-release-5*.rpm epel-release-5*.rpm


You now have Remi repository on your system. It's disabled by default, and I recommend you leave it as is. To install from remi, run the following:

yum --enablerepo=remi update php

I use remi to install php and its related stuff like GD, mcrypt, etc. As well as MySQL. The repository rocks!

2009/07/07

Recover a disk failure for LVM (CentOS)

I've put together old hardware pieces at home for a download & file sharing box. It got 4 old disks (30G, 250G, 500G, 80G) together. Knowing that disks will out of its life sooner or later, I rsync important stuff to the mac next to it. Couple weeks ago, shit finally happen.

The broken disk is the 30G, so most of stuff are still in the other disks. To recover, I put into a new disk, re-install CentOS, so the box is bootable again. Now I need to re-activate and mount the old disks.

Re-install CentOS
1.Put in the new disk, go to Bios and make sure CD-ROM is having first boot priority, and the new disk is the boot disk in Hard Disk boot priority setting.
2.Put in the CentOS DVD, boot from it. In the install process, make sure you don’t re-partition the old disks.
3.If you are not sure what to do, you can un-plug the power cores of all old disks, install on the new disk first. Once the installation is finished, plug back the power of old disks, boot from DVD again, and reset the boot loader.
4.Now you’ve got a bootable box with all the disks in place.

RHEL systems like Red Hat, CentOS or Fedora, partition the disks automatically at install time. By default, it sets up the partitions using LVM for the root device.
By default, the OS set up a volume group called VolGroup00, with two logical volumes, LogVol00 and LogVol01, the first for the root directory and the second for swap.

Since the new disk is big enough, I set up the new disk (not using the volume). As you can see in the partition layout of physical disks below (/dev/sda is the new disk):
[root@xxx]# sfdisk -l

Disk /dev/hda: 19457 cylinders, 255 heads, 63 sectors/track
Units = cylinders of 8225280 bytes, blocks of 1024 bytes, counting from 0

Device Boot Start End #cyls #blocks Id System
/dev/hda1 * 0+ 19456 19457- 156288321 8e Linux LVM
/dev/hda2 0 - 0 0 0 Empty
/dev/hda3 0 - 0 0 0 Empty
/dev/hda4 0 - 0 0 0 Empty

Disk /dev/hdc: 24792 cylinders, 255 heads, 63 sectors/track
Units = cylinders of 8225280 bytes, blocks of 1024 bytes, counting from 0

Device Boot Start End #cyls #blocks Id System
/dev/hdc1 * 0+ 24791 24792- 199141708+ 8e Linux LVM
/dev/hdc2 0 - 0 0 0 Empty
/dev/hdc3 0 - 0 0 0 Empty
/dev/hdc4 0 - 0 0 0 Empty

Disk /dev/sda: 38913 cylinders, 255 heads, 63 sectors/track
Units = cylinders of 8225280 bytes, blocks of 1024 bytes, counting from 0

Device Boot Start End #cyls #blocks Id System
/dev/sda1 * 0+ 12 13- 104391 83 Linux
/dev/sda2 267 38912 38646 310423995 83 Linux
/dev/sda3 13 266 254 2040255 82 Linux swap / Solaris
/dev/sda4 0 - 0 0 0 Empty

Disk /dev/sdb: 60801 cylinders, 255 heads, 63 sectors/track
Units = cylinders of 8225280 bytes, blocks of 1024 bytes, counting from 0

Device Boot Start End #cyls #blocks Id System
/dev/sdb1 * 0+ 60800 60801- 488384001 8e Linux LVM
/dev/sdb2 0 - 0 0 0 Empty
/dev/sdb3 0 - 0 0 0 Empty
/dev/sdb4 0 - 0 0 0 Empty


To re-activate and re-mount
vgchange is the utility to update/change your volume group attribute. Since one of the disk in previous volume is missing, I need to vgchange –ay –partial to activate the volume.

[root@xxx]# vgchange –ay –partial
Couldn't find device with uuid 'AiegxE-NfQy-AA5E-OUcn-bvpY-UG3o-5oT1gY'.
/dev/mapper/VolGroup00-LogVol00-missing_3_0: read failed after 0 of 4096 at 0: Input/output error
/dev/mapper/VolGroup00-LogVol01-missing_0_0: read failed after 0 of 4096 at 0: Input/output error
/dev/VolGroup00/LogVol01: read failed after 0 of 4096 at 0: Input/output error
Couldn't find device with uuid 'AiegxE-NfQy-AA5E-OUcn-bvpY-UG3o-5oT1gY'.
2 logical volume(s) in volume group "VolGroup00" now active


Well, a lot of error due to the missing disk, but the volume is active now. You can verify by:

[root@xxx]# lvscan
/dev/VolGroup00/LogVol00: read failed after 0 of 4096 at 892413607936: Input/output error
/dev/VolGroup00/LogVol00: read failed after 0 of 4096 at 892413665280: Input/output error
/dev/mapper/VolGroup00-LogVol01-missing_0_0: read failed after 0 of 4096 at 2080309248: Input/output error
/dev/mapper/VolGroup00-LogVol01-missing_0_0: read failed after 0 of 4096 at 4096: Input/output error
/dev/mapper/VolGroup00-LogVol01-missing_0_0: read failed after 0 of 4096 at 0: Input/output error
/dev/VolGroup00/LogVol01: read failed after 0 of 4096 at 2080309248: Input/output error
/dev/VolGroup00/LogVol01: read failed after 0 of 4096 at 2080366592: Input/output error
Couldn't find device with uuid 'AiegxE-NfQy-AA5E-OUcn-bvpY-UG3o-5oT1gY'.
/dev/mapper/VolGroup00-LogVol00-missing_3_0: read failed after 0 of 4096 at 0: Input/output error
/dev/VolGroup00/LogVol01: read failed after 0 of 4096 at 0: Input/output error
Couldn't find device with uuid 'AiegxE-NfQy-AA5E-OUcn-bvpY-UG3o-5oT1gY'.
/dev/mapper/VolGroup00-LogVol00-missing_3_0: read failed after 0 of 4096 at 0: Input/output error
/dev/VolGroup00/LogVol01: read failed after 0 of 4096 at 0: Input/output error
Couldn't find device with uuid 'AiegxE-NfQy-AA5E-OUcn-bvpY-UG3o-5oT1gY'.
ACTIVE '/dev/VolGroup00/LogVol00' [831.12 GB] inherit
ACTIVE '/dev/VolGroup00/LogVol01' [1.94 GB] inherit


Now you can mount the active volume by:
[root@xxx]# mount /dev/VolGroup00/LogVol00 /mnt

The old volume is now accessible at /mnt
[root@xxx]# ls –al /mnt

What Next
I copy the stuff I want to recover. What to do with the old drives? I need to think about...Having a old box on all time is actually costly (in term of electric bill). But having a box on is handy in many occurrences..

Ref:
http://www.linuxjournal.com/article/8874
http://fedoraforum.org/forum/archive/index.php/t-64964.html

2009/06/30

win2k8 workstation - Disabling Internet Explorer Enhanced Security using registry

To turn off Internet Explorer Enhanced Security Configuration, you can remove the IEHarden registry entry from the user account profile. To do this, follow these steps:

1. run Regedit.exe.
2. Locate and then click the following registry subkey: HKEY_CURRENT_USER\Software\Microsoft\Windows\CurrentVersion\Internet Settings\Zonemap
3. In the details pane, right-click IEHarden, click Modify, type 0 (zero) in the Value data box, and then click OK.
4. You can also remove this registry entry. Locate and then click the following registry subkey: HKEY_CURRENT_USER\Software\Microsoft\Windows\CurrentVersion\Internet Settings
5. In the details pane, right-click IEHardenIENoWarn, click Modify, type 0 (zero) in the Value data box, and then click OK.
6. Exit Registry Editor, and then start Internet Explorer.
7. On the Tools menu, click Internet Options. Click the Advanced tab, click Restore Defaults, and then click OK.

2009/06/27

How to sync an iPhone with two (or more) Computers

http://theappleblog.com/2009/02/26/sync-iphone-ipod-with-multiple-computers

One thing I have always wanted to do is be able to sync my iPhone or iPod with any computer. Lifehacker had an article a while back on doing this, but the software they used does not support the iPhone or iPod touch. So, I have developed a method to connect any iPod or iPhone to any computer to download the music or movies from that computer to the iPod or iPhone.

Once configured, you only need your iPhone/iPod, the USB sync cable, and a computer with iTunes to implement the hack (the idea being you always have your iPhone or iPod and the person with the computer has the iPod USB cable). It takes about 20 minutes to set this hack up and then only a few seconds to implement each time you would like to use it.

Things to Note

  • If you want to be able to do this hack on both Mac and Windows machines, you’re going to have to configure two separate iTunes libraries: one from a Mac and one from a Windows machine.
  • I was using an iPhone when writing this tutorial, so the iPod directions may vary slightly.
  • If you are using an iPhone or iPod touch: When you sync your device, the account last used to access the iTunes Store from the computer is synced to the mobile device. So make sure you sign out of your friend’s iTunes account before you sync your device, otherwise when you try to download the application via the app store on your phone you will be logged in as them.
  • This method does not work with DRM’ed music.
  • Using this method will let you plug your iPhone/iPod into any computer and listen to the music directly off of it. Whereas before, this was not possible.

What You’ll Need

Configure Your iPhone/iPod for Use as External Storage

You are only going to have to configure your iPhone or iPod to be used an external storage once.

  • iPhone: Download & Configure Air Sharing ($4.99)
  • iPod: Setup as hard drive
    1. Connect iPod to computer and open iTunes
    2. iTunes > Preferences > iPod Tab
    3. Click checkbox “Enable disk use”
    4. Close iTunes

Manually Manage Music and Videos On iPhoneiPod

We need to make it so we can simply drag songs onto our iPhone/iPod.

  1. Launch iTunes
  2. Connect iPhone/iPod
  3. Select the “Manually manage my iPhone/iPod” option
  4. Close iTunes

Create an iTunes Index On Your iPhone/iPod

If you want to be able to sync with both Mac and Windows computers you will have to make two separate iTunes index folders: one for the Mac and one for Windows boxes. So, just do this step both a Mac and Windows machine.

  1. Mount your iPhone/iPod as external storage device.
  2. Point the iTunes index to your iPhone/iPod. On a Mac: while holding “option,” double click on your iTunes icon. On a Windows machine: while holding “Shift,” double click on your iTunes icon in your start menu.
  3. A “Choose your library” window will pop up. Select “Create Library.”
  4. Under “Where” select the location on your iPod/iPhone from the pulldown. Save as: “iTunes1″. iTunes will Launch. Close it. If you decide to do this on a Mac and Windows machine, make a folder called “iTunes 1″ from the Mac and a folder called “iTunes 2″ from the Windows machine.

Editing Files On iPhone/iPod

You are only going to have to edit the files on your iPhone once. We need to edit those files so that whatever computer you connect your device to will think it can sync to your iPhone/iPod. I found this tutorial over at the Shiny Things blog. Thanks Andrew!

  1. On your computer navigate to your iTunes music folder. Macs: User> Music > iTunes. Windows: Music > iTunes.
  2. Right click on “iTunes Music Library.xml” and open it with a text editor (Smultron, or something similar, in OS X and Notepad in Windows)
  3. Look for the “Library Persistent ID”
  4. There will be a string of numbers and letters between the “string” tags. (In the screenshot below it is 2817B0BEDC7A2E5F). Copy this entry to another document for safe keeping.
    itunes_xml
  5. It’s time to edit the files on your iPhone/iPod. Go ahead and mount your iPhone/iPod and then navigate to the iTunes folder we created earlier.
  6. Find the “iTunes Music Library.xml,” and open it with a text editor.
  7. Look for the “Library Persistent ID.” First, copy whatever is between “string” tags to a text document for safe keeping. Next, Replace whatever is between the “string” tags with our key that we copied earlier. In our example we are replacing the ID on the iPhone/iPod with 2817B0BEDC7A2E5F
  8. Save the file and close it.
  9. Now find the file called “iTunes Music Library” and open it with the Hexeditor mentioned above in “What You’ll Need.” (On a Windows machine it is called “iTunes Music Library.itl”)
  10. Select “Find and Replace” from the Edit menu. Make sure “Hex” matching is selected (not ASCII). In “Find” enter the ID from the iPhone/iPod before we replaced it (The ID we put into a text document in step 7). In Replace, enter the ID we copied from the original computer (in our example it’s 2817B0BEDC7A2E5F). Choose Replace All, there should be one match.
  11. Save the file. Close the Hexeditor.
  12. We are now completely done configuring the iPhone/iPod. If you want to be able to sync to both Windows and Mac machines, make sure the do the all the steps listed above on both machines.

Getting Music From Other Computers (Finally!)

Getting music from computers that are not your home computer is the step that you will have to perform over and over again.

  1. Mount your iPhone (using Air Sharing) or iPod (as an external storage device)
  2. Point the computer’s iTunes index to the one on your iPhone/iPod. Mac: while holding “option,” double click on your iTunes icon. Windows: while holding “Shift,” double click on your iTunes icon in your start menu.
  3. A “Choose your library” window will pop up. Select “Choose Library.”
  4. Navigate to the “iTunes 1″ or “iTunes 2″ (depending on if you’re on Mac or a Window’s machine) folder on your iPhone/iPod and select “Open”
  5. iTunes will launch
  6. The actual iTunes library will be empty, this is OK. We aren’t adding things to the iTunes library, just to the iPhone/iPod library. Your iPhone/iPod should appear in the left hand column of iTunes. Click on your iPhone’s or iPod’s music library to select it. A playlist should appear in the main iTunes screen with all the music form the iPhone/iPod.
  7. Drag any music you want into your iPhone’s library. Make sure you drag into your iPhone’s/iPod’s library, not the iTunes library.
    00000211
  8. Since we are loading the library our iPhone/iPod is connected to, not the computer’s local iTunes library, we have to manually locate music on the computer to be able to add it to our iPhone or iPod. In OS X navigate to: User > Music > iTunes > iTunes Music. In Windows navigate to: My Documents > Music > iTunes > iTunes Music.
  9. When you’re done getting music, safely disconnect your iPhone/iPod and close iTunes.
  10. As a final step, we need to point the computer back to its original iTunes library. On a Mac: while holding “option,” double click on your iTunes icon. On a Windows machine: while holding “Shift,” double click on your iTunes icon in your start menu.
  11. A “Choose your library” window will pop up. Select “Choose library.” Point to the iTunes Music folder on their computer (Inside the Music folder on both Mac and PC).

Getting the New Music Back Onto Your Main Computer

iTunes won’t let you take the music off your iPhone/iPod, so we’re going to have to use third party software.

  1. Download iPodDisk (OS X Free Open Source iPod Ripping Software) or Pod to PC (Windows)
  2. I made a playlist on my iPhone called “New” so I know what to download.
  3. Import all songs from the “New” playlist.
  4. Empty the “New” playlist so that you do not accidentally download the same songs next time you sync.

And there you have it! I know it’s a lot to digest, so please let me know if you have any questions in the comments.

2009/05/15

軟體商怎選Apple iPhone與Google Android?

轉貼,源自:http://www.zdnet.com.tw/enterprise/technology/0,2000085680,20137151-1,00.htm
賴飛鵬 2009/04/13 05:00:00

雖然Gartner與IDC等研究單位都預估今(09)年智慧型手機市場的成長率將下滑,如IDC將2009年全球智慧型手機的成長預估從原先的8.6%調降為3.4%,但相較於PC市場的成長趨緩,以及近幾年很少在PC端看到殺手級應用等市場現況,有愈來愈多的軟體開發商(ISV)開始關注智慧型手機市場。

版本不互通,該壓寶何方?近年來最具成長潛力的智慧型手機平台,莫過於2007年7月蘋果(Apple)發表的iPhone,以及同年 11月Google的Android;由於上述2業者都有提供應用程式付費下載平台,如App Store與Android Market,因此,有些獨立軟體開發商(ISV)開始推相對應產品,如甲骨文(Oracle)於去(08)年7月推出適用於Apple iPhone的免費軟體-Oracle商業指示器(Oracle Business Indicators)等。

但對研發資金與資源有限的軟體商來說,到底該先開發iPhone版還是Android版的應用程式?評估點很多,以下,我將提供七個比較點,供軟體商參考、抉擇。

出貨量

對軟體商來說,應用程式的可能銷售量最關鍵,而這可從硬體出貨量來看。舉例來說,由於Windows作業系統的出貨量最大、市佔最高,因此,幾乎所有軟體商都是先開發Windows版個人應用程式後,才會開發Mac版及Linux版;在後端伺服器市場也是如此,由於昇陽的Unix伺服器銷量較惠普(HP)與IBM多,因此,軟體商在開發伺服器應用程式時,也是以Solaris版為先,之後才會考量HP-UX、IBM AIX。

以此看iPhone及Android,iPhone獲得壓倒性獲勝。理由是,iPhone 3G除在開賣後的3、5天即賣出100萬台的佳績,半年後,更有超過500萬台(尚未加上2G版iPhone的銷售量)的數量,反觀首款Android手機─HTC G1,則未破百(萬台)。

是故,第一回合是由出貨量較高的iPhone獲勝;可能讀者會說,不是有研究單位預估2012年後,Android出貨將超越iPhone,但我認為,眼前的事實勝於未來推估。

硬體應用的可能性

iPhone不只是智慧型手機。雖然iPhone是手機,但就其內嵌Safari瀏覽器這點來看,也可將之歸類成行動網路裝置 (MID),再加上蘋果有意將iPhone發展成掌上遊戲(這或許與App Store上銷售最多的應用程式是遊戲有關),因此,也可將之視作掌上遊樂器;我想,不久的未來,可能會看到其與Sony PSP、Nintendo DSL/DSi競爭。

另外,蘋果雖然將由iPhone變種的iPod touch定位成隨身聽,但就其規格、功能來看,也可將之視作可攜式媒體播放器(PMP)。

但與Android相較,iPhone的應用顯得有些狹隘。因為Android除早有前述應用外,還有其他可能的應用模式,如個人導航機(PND)、小筆電(Netbook),甚至是小型的固接式數位相框(DPF)等。

第二回合,是以硬體應用層面較廣的Android勝iPhone。

軟體應用的可能性

瞭解硬體的可能應用後,也得了解軟體的潛在應用─這方面是Android勝iPhone。理由是,蘋果禁止軟體商開發某類型服務,如不准軟體商開發iPhone的VoIP應用程式,但Android並無此限制。

我認為,蘋果之所以會限制軟體商研發VoIP等應用服務,最可能的原因是該類應用有其他潛在商機存在,因此,蘋果才會保留下來留待日後自行發展、或將之用做與其他業者進行合作時的談判(交換)籌碼。

開發門檻高低

除了市場考慮,還得進一步考量開發門檻,例如軟體商必須使用蘋果的Xcode開發工具,才能開發iPhone版應用程式,而開發Android應用程式則需使用Eclipse。

稍有程式開發經驗者都知道Eclipse的氣勢遠勝Xcode:Xcode除操作介面具備蘋果慣有的舒適外觀外,其餘一切都輸給 Eclipse。舉例來說,Xcode只能在Mac電腦上執行,因此,想開發iPhone的軟體商一定得先花錢買Mac電腦─至少得花20,900元新台幣買Mac mini。反觀Eclipse,由於其可支援跨Windows、Linux與Mac OS X等作業平台,是故,軟體商多半不用額外花錢購買電腦,可在既有電腦上安裝開發工具/環境。

相較其他程式開發語言,用來開發iPhone應用程式的Objective-C顯得不大容易使用。從字意上,Objective-C好像與C語言相似,但事實是,其為物件導向語言,類似C++;到底有多不好學?曾有某位知名程式師直言道:就所學的十多種程式語言,就屬Objective-C最難用。

Objective-C的難用可從其發展淵源來瞭解─Objective-C是Steve Jobs在NeXT軟體部門研發出的程式語言,是故,當Jobs重返蘋果,除將NeXTSTEP作業系統的Mach移植至Mac OS X,相關軟體技術也一併採行,如Objective-C等。

Objective-C之所以不易學習,在於其與主流程式的設計迥異、支援的開發工具較少,且範例程式也很少等因素有關。舉例來說,他類程式語言只需3、4行即可實現的功效,Objective-C則要10餘行才能實現。或許您會想,蘋果難道不知道他們家的開發工具不大好使用?我想這可從蘋果的經營風格、企業文化本就講究特立獨行、拒絕跟風來預測其動向:即便世人認為其的程式語言與開發工具不易使用,其也未必會進行改變。

相對的,Android使用的類Java語法與Java的相似度達85%~90%,開發人員雖不能直接使用Java類別庫(Class Library),但至少能快速的將原有邏輯重新詮釋改寫。所以,第四回合─是否易於開發?Android勝iPhone。

註冊(使用)費

想開發iPhone版應用程式,並且在App Store上架販售者,必須先向蘋果註冊─註冊費每年99美元,若需要技術支援服務,則得每年支付199美元。相對的,Android雖然也需要繳交註冊費,但註冊費僅25美元,而且,只要付一次即可,我想,勝負不問自明。

軟體銷售後的拆帳比率

透過App Store賣掉應用程式後,蘋果要抽30%的利潤,若一套軟體賣10美元,那原開發商得7元,蘋果得3元。

同樣的,Android雖然也要拆帳,拆帳比也是37分帳,不過30%不是由Google取走,是給在地電信營運商,如台灣的台灣大哥大、中華電信等,這種拆帳機制讓本土電信營運商更積極的支援、推廣Android。因此,就大方度來說,Android算略勝iPhone。

上架審核機制

審核過的應用程式才能放上App Store;一開始,蘋果的審核速度還算快,但在iPhone熱銷後,軟體商開發應用程式的速度開始大增,但蘋果的審核速度卻有變慢之嫌,甚至出現上架塞車的問題。某軟體商即曾對我表示,應用程式多半得等上4到8、9個月,才有可能在Apple Store上架。

除塞車問題外,蘋果還會給開發者許多「建議」,例如,程式介面與蘋果的簡約直覺風格不合、或美感不足等;而且,那些沒有依照其建議進行修改者,蘋果不會允許其上架!

更令人覺得不可思議的是,已獲蘋果審核且上架者,也會遭到無預警(說明)下架。另外,在美國那種消費者意識高漲的市場中─消費者可在鑑賞期內毫無理由退貨,App Store卻沒有所謂的退費機制。

相對的,Android Market則是全然的門戶大開,不會對上架軟體進行審核,但缺點是上架軟體的水準不齊,有涉及犯罪、暴力、邪教的可能。因此,在上架審核這關─iPhone把關過嚴,Android則把關過鬆,雙方和局。

結尾

我這邊必須強調,選擇加入Apple或者是Google陣營的評核點不只上述七點,但礙於篇幅限制,無法盡列。

總的來說,雖然Android的政策較iPhone大方、技術也較超越,但若以出貨量與應用程式數等兩者評估市場性,則是iPhone大勝─iPhone(含iPod touch)除出貨量大、App Store上已累積一萬多個應用程式,這些都是Android所不及。

但若從其他構面來看,如蘋果長久採封閉、獨佔性政策,硬體產品未曾在全球市場上獲得主佔地位(最近市佔落在9到11%的Mac的最顛峰是在1992年的12%,當時Jobs是在NeXT就任而非蘋果,最慘則在1997到1998年間,除美國市佔跌破5%外,全球市佔亦跌破3%),不會因為市場景氣狀況調降(多數)產品售價,以及購買者多屬Mac迷、Apple擁護者、或者是Jobs信徒(70%的iPod購賣者集中在加拿大與美國等地區、43%以上的iPhone購買者集中在高時尚、高消費的紐約市及加州,且有近半的iPhone購買者已擁有iPod)等,未來,iPhone能否持續發熱,是個未知數。

相對的,Google投下資金與資源研發的軟體(或網路)標準、平台與服務,已有多項成為全球主佔,如Google Search、GMail等(當然,失敗也不在少數,如Google Voice、Google Talk)。

由此來看,iPhone與Android孰勝孰敗尚未定;此外,除上述兩者外,建議開發商仍要持續關注即將進入7.0版Windows Mobile,將大幅調整發展模式的Symbian、決定在穩固商務市場後跨入娛樂市場的RIM,以及在CES 2009上獲高度喝采的Palm Pre等。

編按:作者為行動裝置韌體工程師,該領域工作經驗約七年餘。

2009/04/20

hackintosh - Intel graphic card resolution

http://www.insanelymac.com/forum/lofiversion/index.php/t5513.html

For G33,Q33 Intel chip, there's no ktext for it; however you can do this to alter the resolution:

vi /Library/Preferences/SystemConfiguration/com.apple.Boot.plist

Edit string value for Kernel Flags,
Kernel Flags
"Graphics Mode"="1280×1024×32"

After reboot, it's default to 1280x1024 instead of 1024x768, much better.

This works on iDeneb 10.5.6.

2009/03/16

Fixing Word 2007 Crash on Exit & Broken Mouse Support!

Thanks to Joe Stagner to provide the fix.

I love Office 2007, but recently I've had big problems with Word.

1.) I can't select text.....
It seems this is a common problem with a number of add-ins. In this case it was the Word plug-in for Snag-It 8 from TechSmith - when I uninstalled it, mouse support came back. Note that this is not JUST a Snag-It problem. A bit of searching on the web reveals that MANY plug ins can cause this problem.

2.) The more irritating but was that Word always crashes on exit. I tried disabling and removing all the add-ins, deleting all the auto loaded templates, even uninstalling and re-installing Office 2007 with no success. Just about the time I was about to commit to waste my day rebuilding my day - I found the answer in a newsgroup archive.

DO THIS !!!

1. Start Regedit.
2. Go to HKEY_CURRENT_USER\Software\Microsoft\Office\12.0\Word\Data
3. Right mouse click on the "Data" folder and delete it.
4. Close Regedit.

POOF - Word 2007 is back to it's awesome self !!
http://joeon.net/post/Fixing-Word-2007-Crash-on-Exit-amp3b-Broken-Mouse-Support!.aspx

2009/03/08

3G手機看電視 月租128元起無限「看」到飽

記者蘇湘雲/台北報導 (2009/03/06 13:46)

要用3G手機看電視,用戶期盼的就是「畫質愈來愈好、收費愈來愈少、節目多且便宜又大碗」!中華電信宣布,提升3G高畫質手機服務,結合60款高畫質手機支援搭配,提供28個頻道,月租費128元到199元四個等級吃到飽的月租費服務,市場吸睛力愈來愈強。

中華電信自07年9月起推出手機電視,不過,受限於傳統手機功能很陽春需通過瀏覽WAP網頁點選節目、頻道選擇過少、精采內容採逐項收費與每秒傳輸速率過慢等因素,到現在用戶數只有6,000人,成長有限。

為擴大3C行動生活圈概念,中華電宣佈,將傳輸速率增加到384kbps,畫質從過去176x144像素升級為320x240像素,結合民視、非凡、華視、台視等電視台合作,與手機廠商合作推出能支援高畫質影像的60款手機,包括HTC、LG、Nokia、Samsung、SonyEricsson等;預讓手機節目看起來「清晰又動人」。

收費上,中華電也大打「動人」牌!共計28個頻道,四大館區、三種收費選擇,包括台灣手機電視特價區、無線歡樂電視區、NBA美國職籃直播和重播區、SBL超級籃球聯賽的直播和重播區。

前兩區月租168元,第一區可收看民視新聞台、民視無線台、非凡新聞台、大愛等13個頻道、無線歡樂電視區可看中天新聞台、台視綜合台、中視娛樂台、華視綜合台、緯來等10個頻道。NBA美國職籃直播和重播區月租199元;SBL超級籃球聯賽的直播和重播區,月租128元。值得開心的是,四大館區的月租費128元到199元,全採吃到飽、無上限分鐘數收看,可望滿足消費者「眼慾」。

遠傳去年也曾推出H.264高畫質編碼的行動電視頻道,加上「選台器」功能吸引消費者,但是月租費199元只能看10個頻道,上限2000分鐘,大多數消費者還是難以提起勁來。

2009/02/28

台灣五個七年級大男生創立「易訂網」 40秒完成線上餐廳訂位

Yahoo! 新聞 更新日期:2009/02/28 14:22 特約記者 薛怡青 台北報導

每到週末要到餐廳吃飯總是人滿為患,偏偏有時候人在外面要跟餐廳訂位又臨時找不到餐廳的電話,為什麼飛機可以網路訂位,電影院可以事先網路劃位,飯店旅館也可以線上訂房,那為什麼沒有餐廳可以網路訂位的呢?這是「eztable易訂網」當初創立的動機。
由5位七年級生所共同創立的「易訂網」網站,就是一個線上餐廳訂位系統的網站,目前已有台北縣市、桃園、新竹等地區的約100多家飯店與餐廳,包括喜來登飯店、台北晶華酒店、君悅飯店、魔法咖哩、茄子咖哩、鬥牛士、海霸王等等一百多家台灣知名餐館與飯店業者都相繼加入「易訂網」網站的線上訂位系統。
「易訂網」執行長陳翰林表示,單單今年2月分透過「易訂網」線上訂位系統來訂位的客人,就幫喜來登飯店以及魔法咖哩餐廳,都各別帶來破千人的訂位量。很多餐廳與「易訂網」合作後,平均來說都能替餐廳多帶進五、六百人的客源。
「在不景氣時代裡,能多帶進客人訂位,基本上就是商機,就是錢在敲門。」陳翰林表示,以前餐廳訂位不是透過電話、再不然就是e-mail、甚至是客人親自上門訂位,然後餐廳的服務人員再用筆、紙或圖釘等人工的方式記錄下來,而網路訂位是為餐廳開闢另一個行銷資源與商機的管道。
台灣由於許多餐廳、飯店的e化程度不足,甚至沒有電腦、沒有網路設施,而人工記錄是他們最常使用的方式,但往往可能因操作面上的錯誤,或無法即時同步訂位資訊,造成客人在訂位上的不方便。「易訂網」營運長謝智倫就表示,「易訂網」透過幫助餐廳建置一套網路訂位系統,讓「易訂網」的網站與餐廳的訂位系統連線,網友們可以在線上即時得知餐廳最新的訂位情況。
例如A客人是登門訂位、B客人是透過電話訂位,C客人是透過網路訂位,目前餐廳共有多少訂位的客人、還剩幾位空間可訂位等等資訊,網友們都可以直接在「易訂網」的網站上即時得知目前「易訂網」的註冊會員人數,從去年8月上線至今已經超過一萬五千多名會員,而且每天都有將近一百五十至二百名新增的會員,謝智倫很興奮的表示,「曾經有我們的會員在線上只花了40秒就訂位成功,快速又方便,而且在透過網路訂位還享有優惠折扣。」例如,最近一波的活動就是網友可以透過「易訂網」來搶購3月2日與3月3日喜來登飯店下午茶時段,4人同行1人免費的優惠活動;或者3月2日與3月3日喜來登飯店午餐時段,3人同行1人免費的優惠活動。
至於「易訂網」的商業模式則有兩個部分,一是向餐廳與飯店業者每個月收取網路平台的上架費,另一為系統處理費,也就是只要餐廳的訂位是透過「易訂網」來訂位,並且真正到餐廳用餐後,「易訂網」將與餐廳收取實際用餐人數的抽成費用。
今年「易訂網」除了積極努力的繼續擴展線上訂位的餐廳與飯店家數之外,也希望與其他WEB2.0相關網站結盟合作,例如與美食網站「愛評網」(http://www.ipeen.com.tw)或者與辦活動、辦宴會網站的「場地王」(http://www.place.com.tw)等合作,希望可以透過工具性網站與資訊性、社群性網站的相互結合,讓網友們無論在吃或辦活動上面都可以更方便。

線上餐廳訂位網站 Open Table 身價上億

Yahoo! 新聞 更新日期:2009/02/28 14:27 特約記者 薛怡青 綜合外電報導

線上餐廳訂位系統在國外早就有了,而且還有可能成為今年第一個IPO的網路公司,那就是美國的線上餐廳訂位網站「Open Table」。
「Open Table」創立於1998年,設立在舊金山,目前在「Open Table」網站已與全美超過一萬家的飯店與餐館簽約上線,使用者只要登入「Open Table」網站,就可以瀏覽這一萬家的飯店餐館,並且即時線上預訂座位,已經有來自全球各地9千萬網友的成功訂位用餐。
由於「Open Table」網站的營運模式有一項營收來源是和餐廳業者抽成,也就是說,越多網友透過「Open Table」網站向餐廳訂位,因為「Open Table」網站為餐廳帶來客源,「Open Table」網站就向該餐廳收取每位用餐者一美元的抽成費用。
因此,為了鼓勵網友上線來訂位,「Open Table」還設立了積點優惠制度,例如每一次透過「Open Table」網站在線上訂位成功就可獲得100點,並且針對每個不同地區網友們所贏得的餐廳優惠券都不同。以美國地區來說,如果網友在「Open Table」網站累積到2000點時,就可以獲得美金20元的餐廳優惠券、5000點就可獲得50元美金的優惠券、10000點時就可獲得100元餐廳優惠券。而這些優惠券都可使用在與「Open Table」網站上有簽約的任何餐廳。
「Open Table」網站的作法很聰明,與餐廳簽約並將優惠回饋給網友,讓更多網友上網來訂位,為餐廳帶來更多的客源,而「Open Table」網站也就可以跟餐廳抽成更多費用。根據分析師的預估,「Open Table」網站年營收可能將近一百五十萬美元,甚至有可能成為一億美元身價的網路公司,事實上,至去年第三季結束前,「Open Table」網站已經進帳4130萬美元。
「Open Table」網站不僅可以透過PC線上訂位,也可使用手機行動上網來訂位,甚至連最近相當火紅的iPhone,「Open Table」網站也有開發相關的應用程式,讓擁有iPhone的使用者都可以下載並安裝,就可以透過iPhone直接連線進行線上訂位。
目前「Open Table」網站更預備上市計畫,並希望公開募股四千萬美元的資金,為股票上市作準備,看來網路產業因為有「Open Table」網站這匹黑馬而注入更多的朝氣與生機。

2009/01/06

Network Time (NTP) service in CentOS

Synchronize the clocks is standard now-da-day. If you don't have NTP for some reason, here's how you set it up in CentOS.

First Install the NTP Package on your server as root.

# yum install ntp
Loading “fastestmirror” plugin
Loading mirror speeds from cached hostfile
* base: mirror.steadfast.net
* updates: mirrors.liquidweb.com
* addons: pubmirrors.reflected.net
* extras: pubmirrors.reflected.net
Setting up Install Process
Parsing package install arguments
Resolving Dependencies
–> Running transaction check
—> Package ntp.i386 0:4.2.2p1-8.el5.centos.1 set to be updated
–> Finished Dependency Resolution

Dependencies Resolved

=================================================================
Package Arch Version Repository Size
=================================================================
Installing:
ntp i386 4.2.2p1-8.el5.centos.1 base 1.3 M

Transaction Summary
=================================================================
Install 1 Package(s)
Update 0 Package(s)
Remove 0 Package(s)

Total download size: 1.3 M
Is this ok [y/N]: y
Downloading Packages:
(1/1): ntp-4.2.2p1-8.el5. 100% |=========================| 1.3 MB 00:19
Running rpm_check_debug
Running Transaction Test
Finished Transaction Test
Transaction Test Succeeded
Running Transaction
Installing: ntp ######################### [1/1]

Installed: ntp.i386 0:4.2.2p1-8.el5.centos.1
Complete!

Next set it to start automatically on a reboot

# chkconfig ntpd on

Tell it which NTP server it should update it’s time from

# ntpdate pool.ntp.org
4 Aug 12:32:43 ntpdate[9540]: step time server 64.202.112.75 offset 1256.453048 sec

Verify that the Time & Date are correct

# date
Mon Aug 4 12:33:04 EDT 2008

Finally start the service

# service ntpd start
Starting ntpd: [ OK ]

Mercury簡易改裝

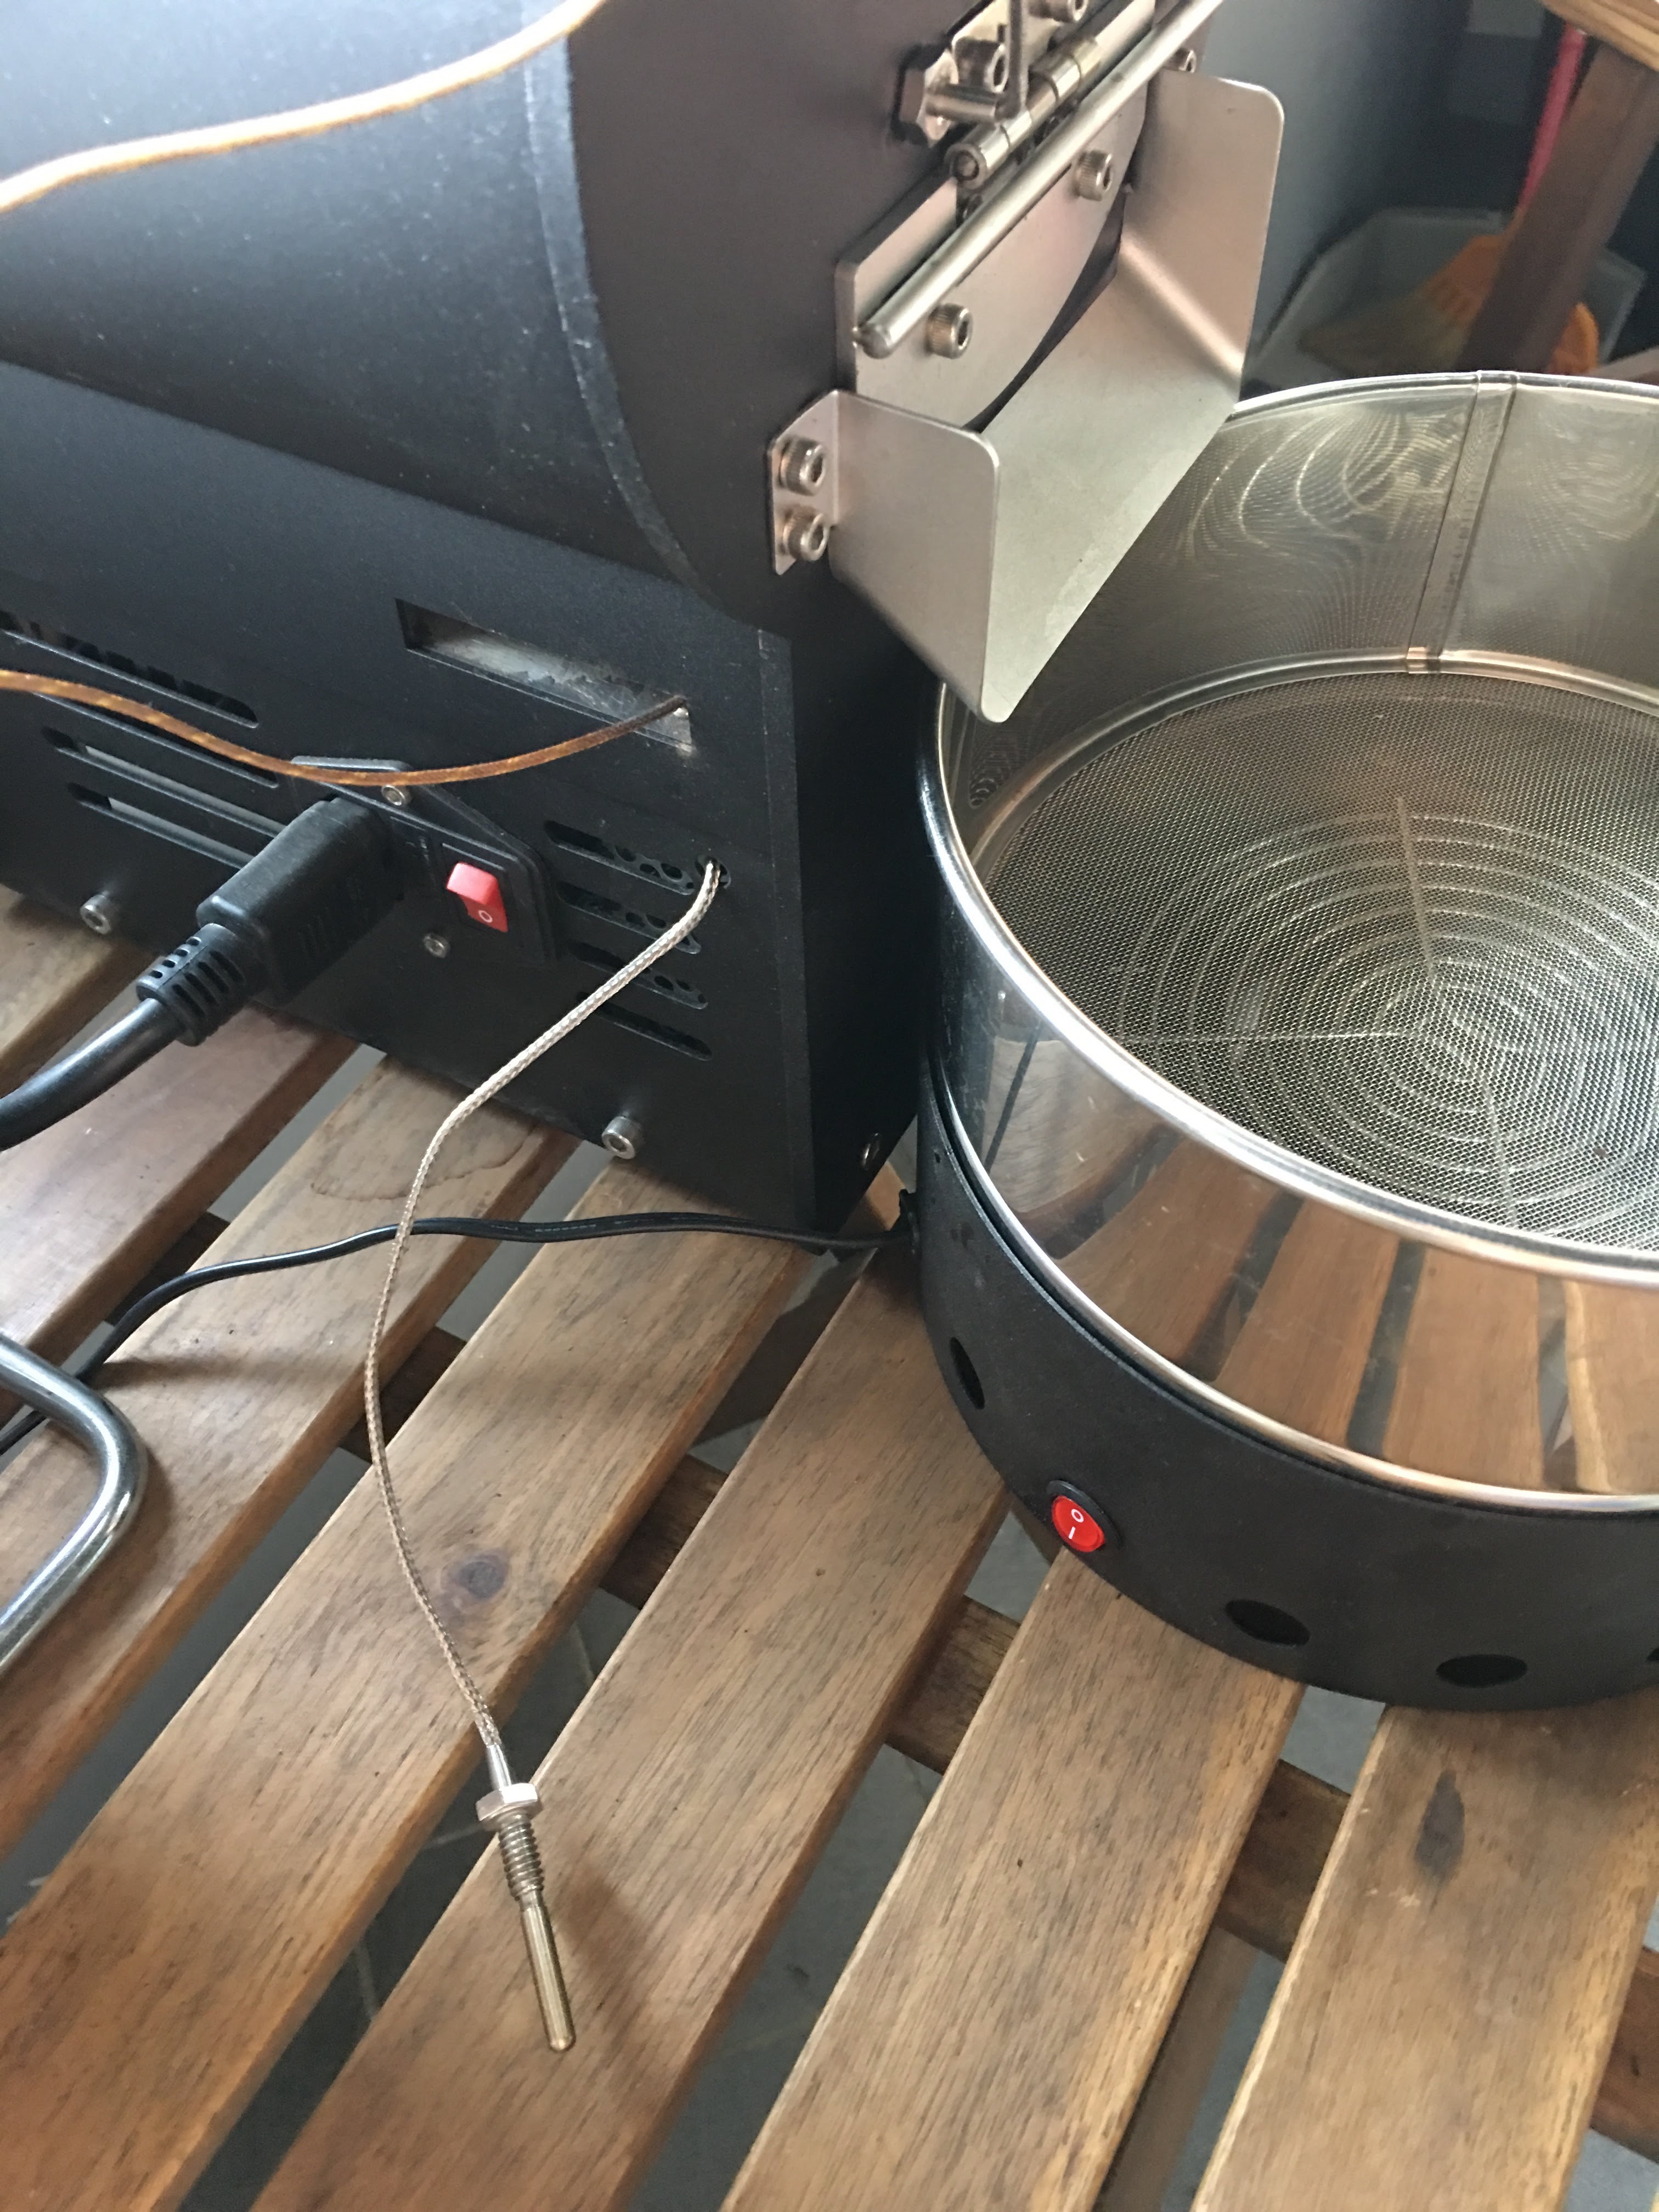
有同好有一樣的困擾 - 如何使用自己的data logging軟體,因此寫了這篇來分享我的簡易改裝。 Background 雲豆子 MERCURY roaster 烘豆機的設計是使用自行開發的軟體,來:1. 操控風門/火力; 2. data logging/自動烘焙。 ...